SU1X 802.1X Windows Deployment Tool Administrator Guide
SU1X User Guide
There are two stages to using SU1X, first the configuration details need to be captured and the application customized for the users site. The second stage is the distribution and use by clients and a setup utility. Below both phases are described in detail.
Configuration of the Utility
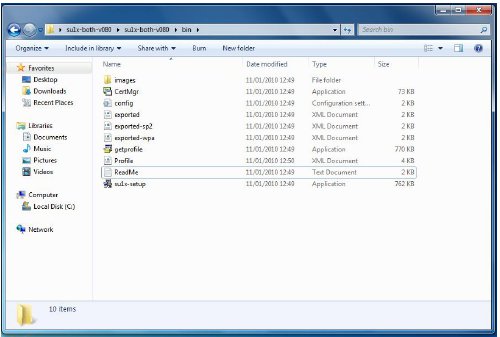
Download SU1XFirst download the latest version of SU1X from sourceforge. The zip file should contain a bin folder with the relevant configuration files and executables and also a source folder.
Configure Example ClientSU1X comes with a tool called ‘getprofile’.exe. This application exports the wireless profile of the Windows machine it is run on. The exported profile file can then be used by the configuration utility to setup clients with identical settings.
- Configure the wireless settings for your site on a Windows machine.
- Download and extract the SU1X utility on the machine that you have just configured. Then navigate to the bin folder.
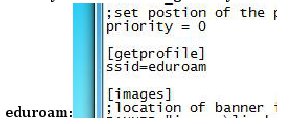
- Edit the ‘config’ file and change the [getprofile] ssid to match the ssid which you wish to configure. By default this is set to eduroam:
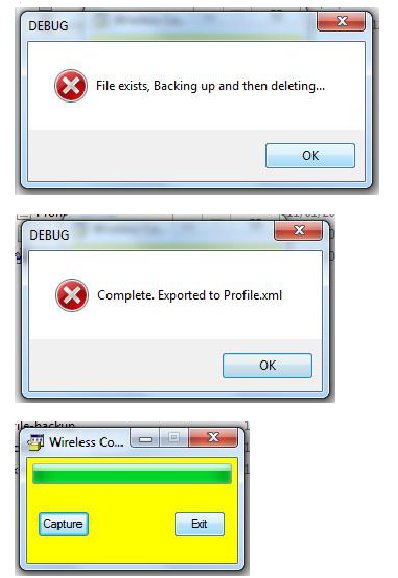
- Run the ‘getprofile.exe’ application and click ‘capture’. When prompted click ‘Ok’ for warnings ‘File exists, Backing up and then deleting…’ and ‘Completed. Exported to Profile.xml’. Then finally click ‘Exit’ to close.


By default the SU1X utility ships with Swansea University branding. This branding is in the form of 4 images stored in the images directory.

These images can be replaced with your sites own branding:
· lis-header.jpg (295x60) - This is the banner image show in the client configuration application main screen.
· bubble1.jpg (373x135) - This image is displayed on the final screen and shows users where to click to sign in
· bubble-vista.jpg (374x59) - This is the vista version of bubble1.jpg.
· bubble-connected-xp.jpg (373x135) - image used for win 7 connected successfully
· connected-7.jpg (56x44) – win7 connected successfully
· connected-vista.jpg (33x30) – vista connected successfully image
If your site wishes to change the location or name of the image files, the config file needs editing. In the config file is a section called [images] which has the names and locations of the image files.

Both the getprofile and su1x-setup applications require some options setting to function properly. These options are set through the config.ini file. This file is split into sections and is commented to explain what each setting does.
- [su1x] - This section defines how the setup application works. This includes the wording for text shown in the main window of the application, such as the title bar.
- [getprofile] - This section defines which ssid the getprofile application gets the settings for.
- [images] - This sets the location and filenames for images used by the application. [remove] - This section sets any settings that need to be removed before installing the new settings. SSIDs are specified for the settings that need to be removed.
- [cert ] - This section sets whether the application should install a certificate and the location and filename of the certificate.
- [printing] – This section defines if the printer tab should be show, and if so, the printer settings to be applied
- [support] – This section defines if the support tab should be shown, and if the support output should be logged to file.
Client Device Configuration
Once the configuration has been captured using the getprofile utility the files can be packaged in a installer or self extracting zip file and distributed to clients. This can be achieved in numerous ways including by usb memory stick or by a download link on a website.
Files Required for Distribution- su1x-setup.exe
- profile.xml
- exported-wpa.xml
- exported-sp2.xml
- exported.xml
- config.ini
- CertMgr.exe
- images (folder)
- certificate file)
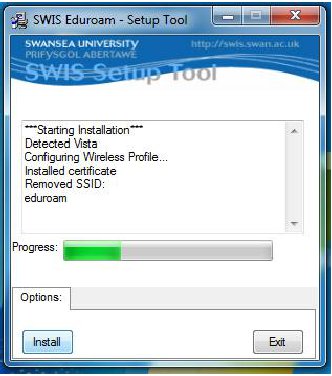
- Extract the required files into a folder2. Run the su1x-setup executable.
- Run the su1x-setup executable.
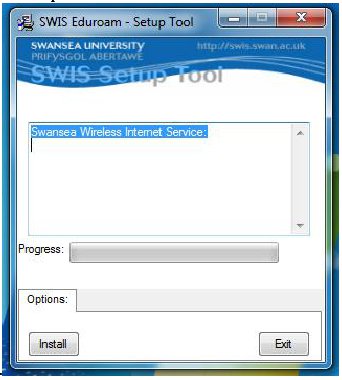
- Click the ‘Install’ Button.
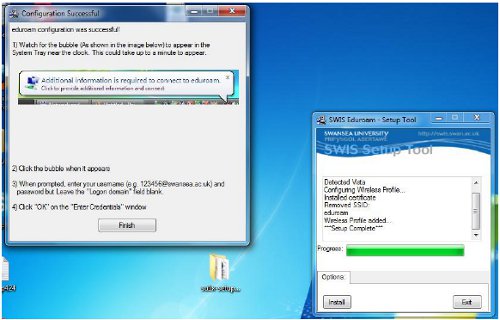
- Once the configuration is complete, a dialogue window will appear informing the user that the configuration was successful. This contains instruction of what to enter in the login credentials box. Click ‘finish’ on this window and then ‘Exit’ on the main application window.
- The files and folder containing the configuration utility can now be deleted from the client machine.


